第8章 RabbitMQ集群架构
1.集群分类
RabbitMQ官网给出了三种集群配置:
- 普通模式:不推荐使用,会丢数据
- 镜像模式:就是主从同步,读写都在主节点上,然后同步到其他节点,官方不再推荐使用,未来计划删除,建议使用仲裁队列。
- 仲裁队列:仲裁队列与RabbitMQ中的其他类型的队列共享许多基础。 但是,它们更有针对性,专注于数据安全和可预测的恢复, 不支持某些功能。
2.创建集群
无论是镜像队列还是仲裁队列,都需要先组成一个集群
项目地址:
Erlang:
https://github.com/rabbitmq/erlang-rpm/releases

RabbitMQ:
https://github.com/rabbitmq/rabbitmq-server/releases

版本对应关系:
https://www.rabbitmq.com/which-erlang.html
下载地址:
https://github.com/rabbitmq/erlang-rpm/releases/download/v26.2.2/erlang-26.2.2-1.el7.x86_64.rpm
https://github.com/rabbitmq/rabbitmq-server/releases/download/v3.12.12/rabbitmq-server-3.12.12-1.el8.noarch.rpm
第一步:配置host解析--所有节点
cat >> /etc/hosts << EOF
10.0.0.51 mq-51
10.0.0.52 mq-52
10.0.0.53 mq-53
EOF
第二步:安装软件--所有节点
rpm -ivh erlang-26.2.2-1.el7.x86_64.rpm
rpm -ivh rabbitmq-server-3.12.12-1.el8.noarch.rpm
第三步:复制cookie文件--重要
scp /var/lib/rabbitmq/.erlang.cookie root@mq-72:/var/lib/rabbitmq/.erlang.cookie
scp /var/lib/rabbitmq/.erlang.cookie root@mq-73:/var/lib/rabbitmq/.erlang.cookie
第四步:记得更改授权--所有节点
chown -R rabbitmq:rabbitmq /var/lib/rabbitmq/
第五步:启动主节点--mq-71执行
systemctl start rabbitmq-server.service
rabbitmqctl stop_app
rabbitmqctl reset
rabbitmqctl start_app
第六步:其他节点加入集群
systemctl start rabbitmq-server.service
rabbitmqctl stop_app
rabbitmqctl join_cluster rabbit@db-51
rabbitmqctl start_app
第七步:设置集群镜像模式
rabbitmqctl set_policy ha-all "#" '{"ha-mode":"all"}'
第八步:查看集群状态
rabbitmqctl cluster_status
第九步:所有节点启动web服务
rabbitmq-plugins enable rabbitmq_management
第十步:创建管理用户--mq-71执行
rabbitmqctl add_user admin admin
rabbitmqctl set_user_tags admin administrator
rabbitmqctl set_permissions -p "/" admin ".*" ".*" ".*"
rabbitmqctl list_users
第十一步:登录web页面
http://10.0.0.71:15672
admin
admin
补充:
集群模式下延迟队列插件的安装
https://github.com/rabbitmq/rabbitmq-delayed-message-exchange
查看插件目录
rabbitmq-plugins directories -s
移动延迟插件到指定目录下,注意所有节点都需要执行
cp rabbitmq_delayed_message_exchange-3.12.0.ez /usr/lib/rabbitmq/lib/rabbitmq_server-3.12.12/plugins/
激活插件,注意所有节点都需要执行
rabbitmq-plugins enable rabbitmq_delayed_message_exchange
查看已经激活的插件
rabbitmq-plugins list
3.镜像队列
3.1 镜像队列介绍
官方文档:
https://www.rabbitmq.com/ha.html
3.2 镜像队列配置
官方文档:
https://www.rabbitmq.com/ha.html#mirroring-argument
镜像队列三种配置解释:
| ha-mode | ha-params | Result |
|---|---|---|
| exactly | count | Number of queue replicas (leader plus mirrors) in the cluster. A count value of 1 means a single replica: just the queue leader. If the node running the queue leader becomes unavailable, the behaviour depends on queue durability. A count value of 2 means 2 replicas: 1 queue leader and 1 queue mirror. In other words: NumberOfQueueMirrors = NumberOfNodes - 1. If the node running the queue leader becomes unavailable, the queue mirror will be automatically promoted to leader according to the mirror promotion strategy configured. If there are fewer than count nodes in the cluster, the queue is mirrored to all nodes. If there are more than count nodes in the cluster, and a node containing a mirror goes down, then a new mirror will be created on another node. Use of exactly mode with "ha-promote-on-shutdown": "always" can be dangerous since queues can migrate across a cluster and become unsynced as it is brought down. |
| all | (none) | Queue is mirrored across all nodes in the cluster. When a new node is added to the cluster, the queue will be mirrored to that node. This setting is very conservative. Mirroring to a quorum (N/2 + 1) of cluster nodes is recommended instead. Mirroring to all nodes will put additional strain on all cluster nodes, including network I/O, disk I/O and disk space usage. |
| nodes | node names | Queue is mirrored to the nodes listed in node names. Node names are the Erlang node names as they appear in rabbitmqctl cluster_status; they usually have the form "rabbit@hostname". If any of those node names are not a part of the cluster, this does not constitute an error. If none of the nodes in the list are online at the time when the queue is declared then the queue will be created on the node that the declaring client is connected to. |
exactly模式
配置命令:
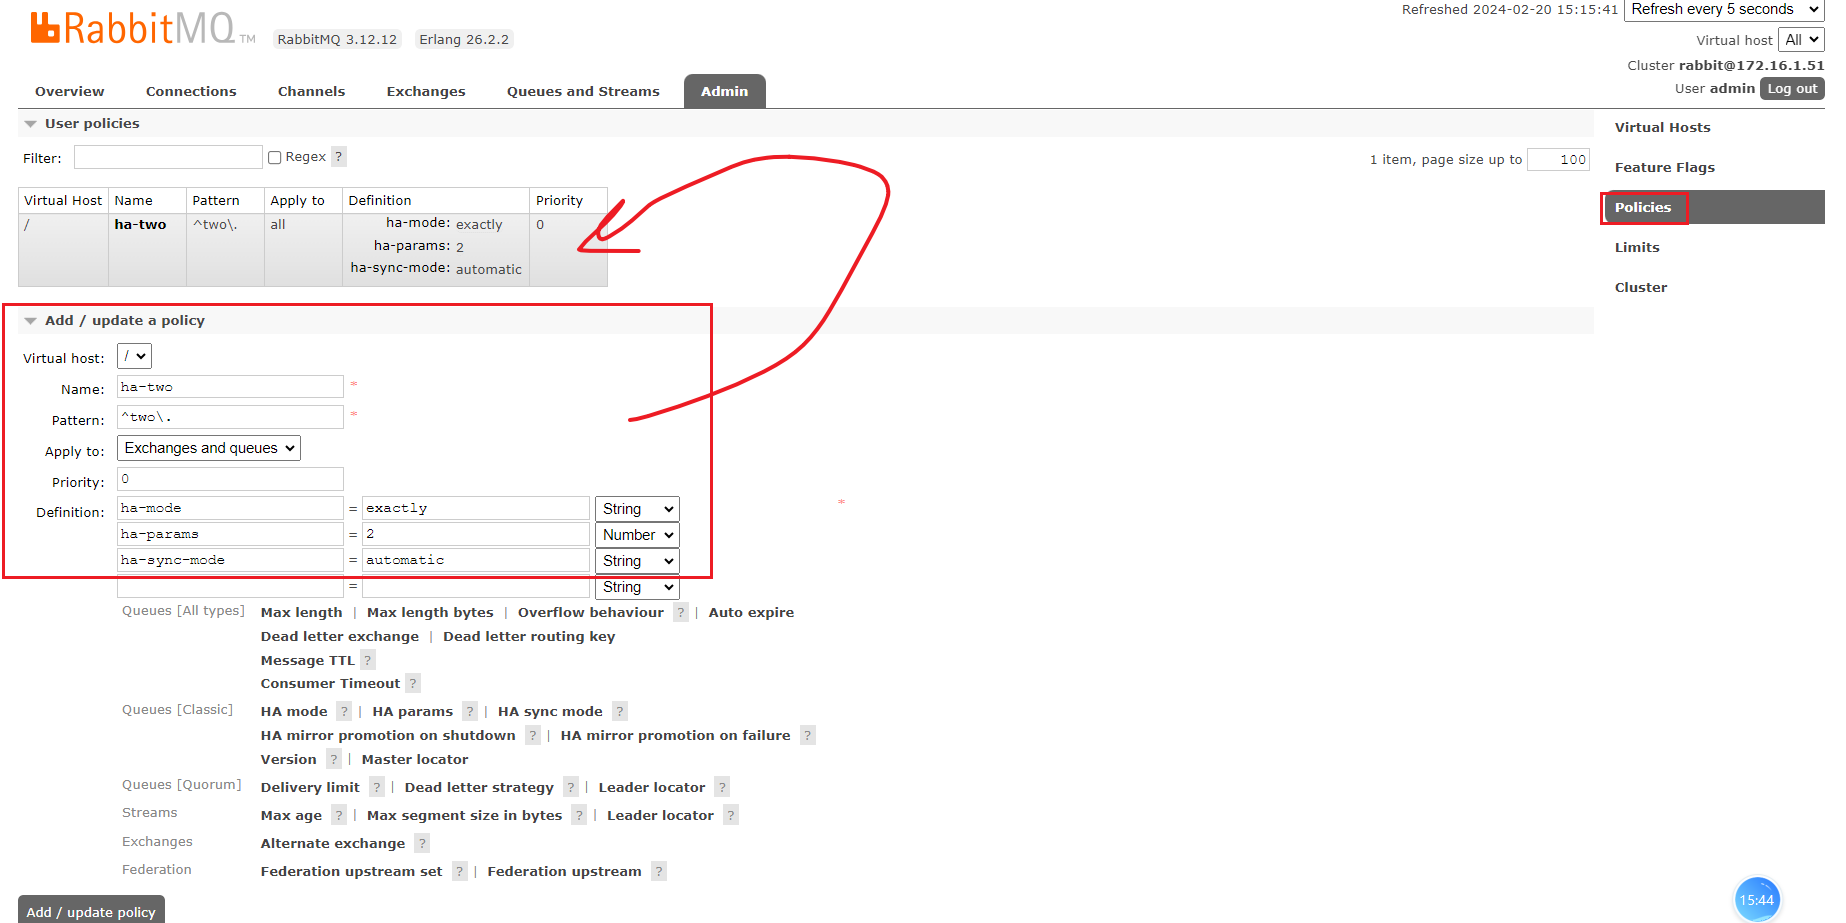
rabbitmqctl set_policy ha-two "^two\."  '{"ha-mode":"exactly","ha-params":2,"ha-sync-mode":"automatic"}'
rabbitmqctl set_policy ha-all ".*"   '{"ha-mode":"exactly","ha-params":3,"ha-sync-mode":"automatic"}'
命令解释:
ha-two: 自定义的策略名称"^two\.": 匹配队列名的正则表达式'{"ha-mode":"exactly","ha-params":2,"ha-sync-mode":"automatic"}': 策略配置"ha-mode":"exactly": 策略模式,这里为exactly模式即指定镜像数量"ha-params":2: 指定的镜像副本数量为2"ha-sync-mode":"automatic": 同步策略,默认不同步,即新加入的镜像节点不会同步旧消息。如果设置为automatic,则新加入的镜像节点会把主节点中所有的消息都同步。
all模式
配置命令:
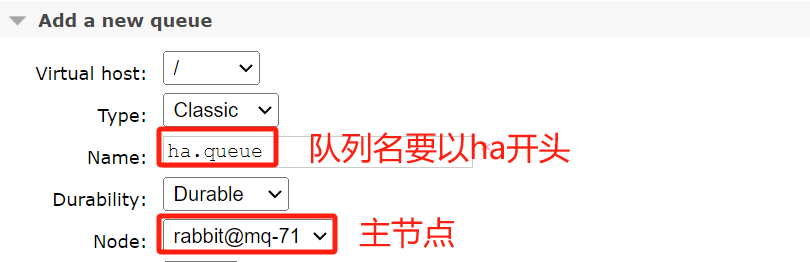
rabbitmqctl set_policy ha-all "^ha\." '{"ha-mode":"all"}'
命令解释:
ha-all: 自定义的策略名称"^ha\.": 匹配所有ha开头的队列'{"ha-mode":"all"}': 策略模式,all表示所有节点都是镜像节点
nodes模式
配置命令:
rabbitmqctl set_policy ha-nodes "^nodes\." '{"ha-mode":"nodes","ha-params":["rabbit@nodeA", "rabbit@nodeB"]}'
命令解释:
策略名称为:ha-nodes
匹配的队列:"^nodes\."
高可用模式:指定nodes节点
高可用参数:node节点的名称为“rabbit@nodeA"和"rabbit@nodeB"
3.3 测试
配置策略模式
配置命令:
rabbitmqctl set_policy ha-all "^ha\." '{"ha-mode":"all"}'
创建队列:
创建完成后的效果:
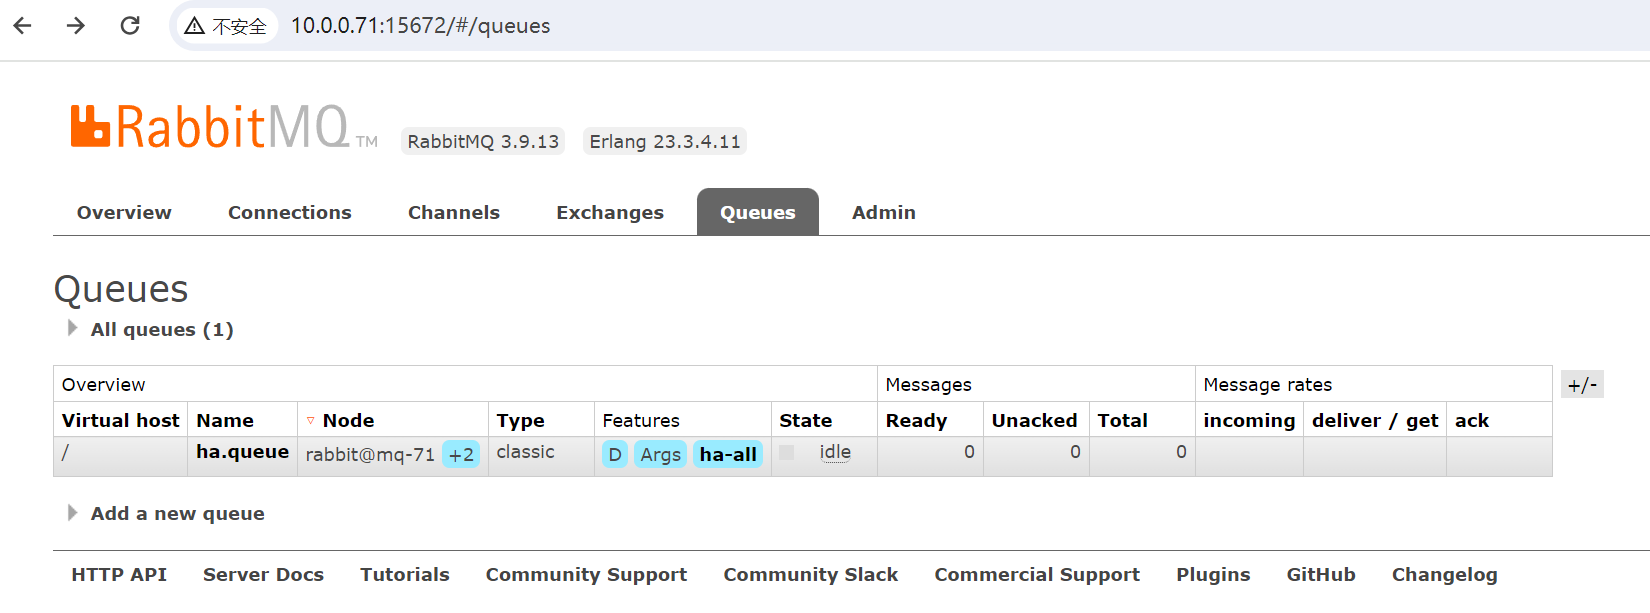
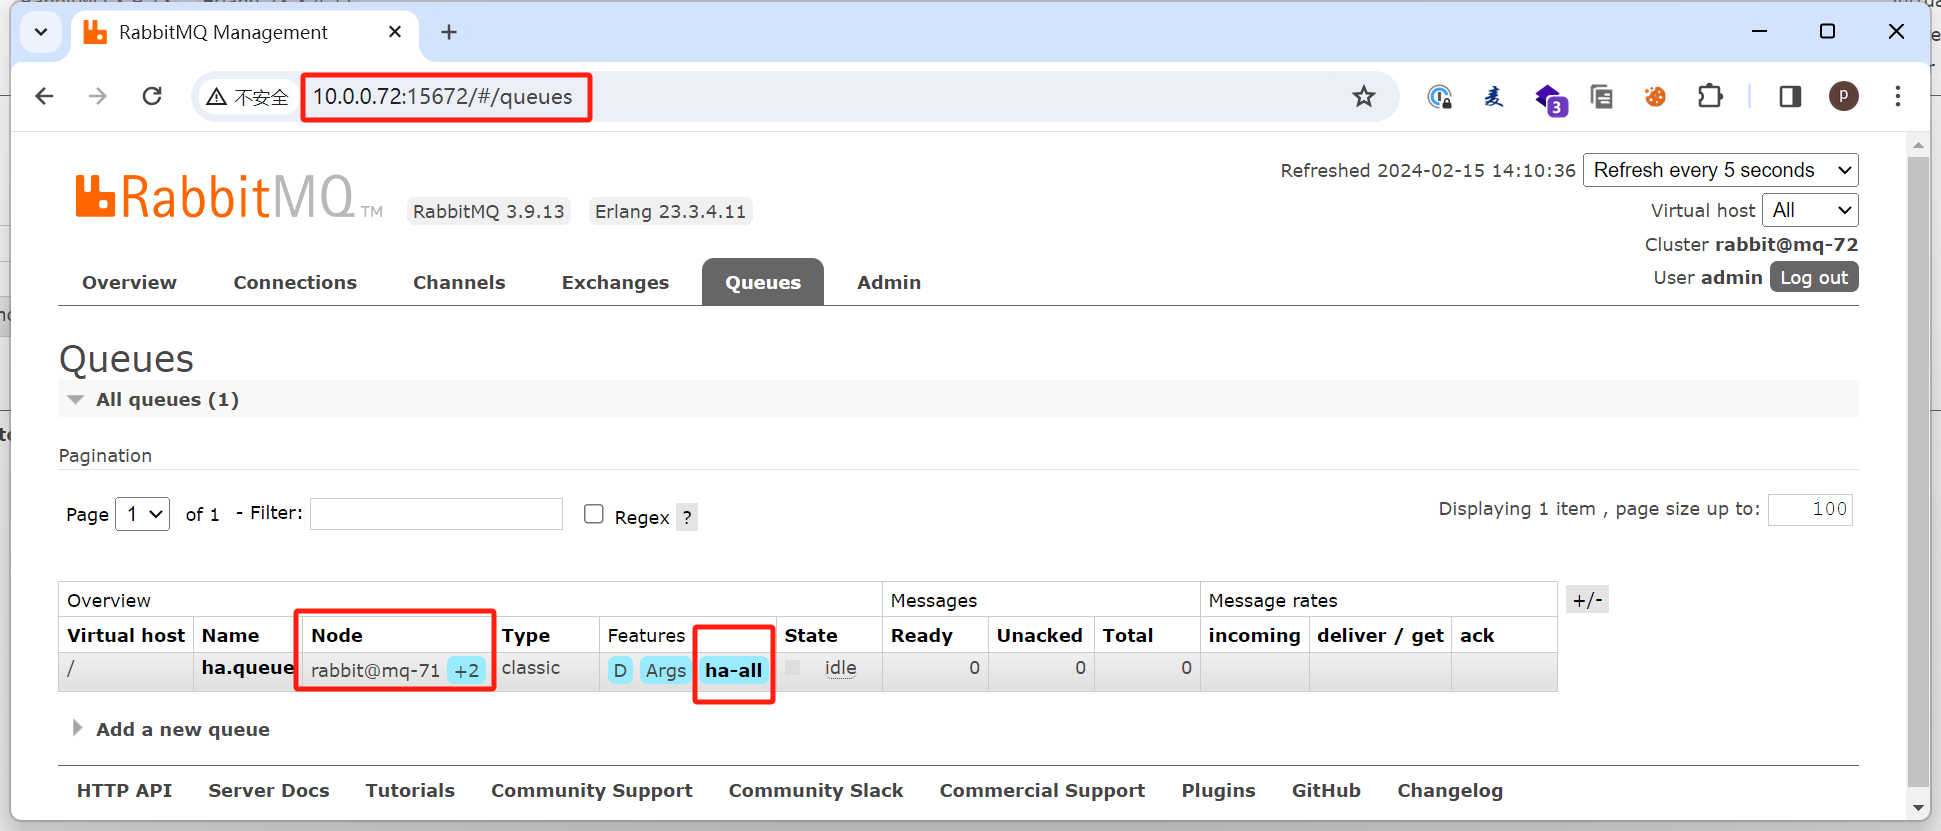
访问其他节点查看
测试数据同步
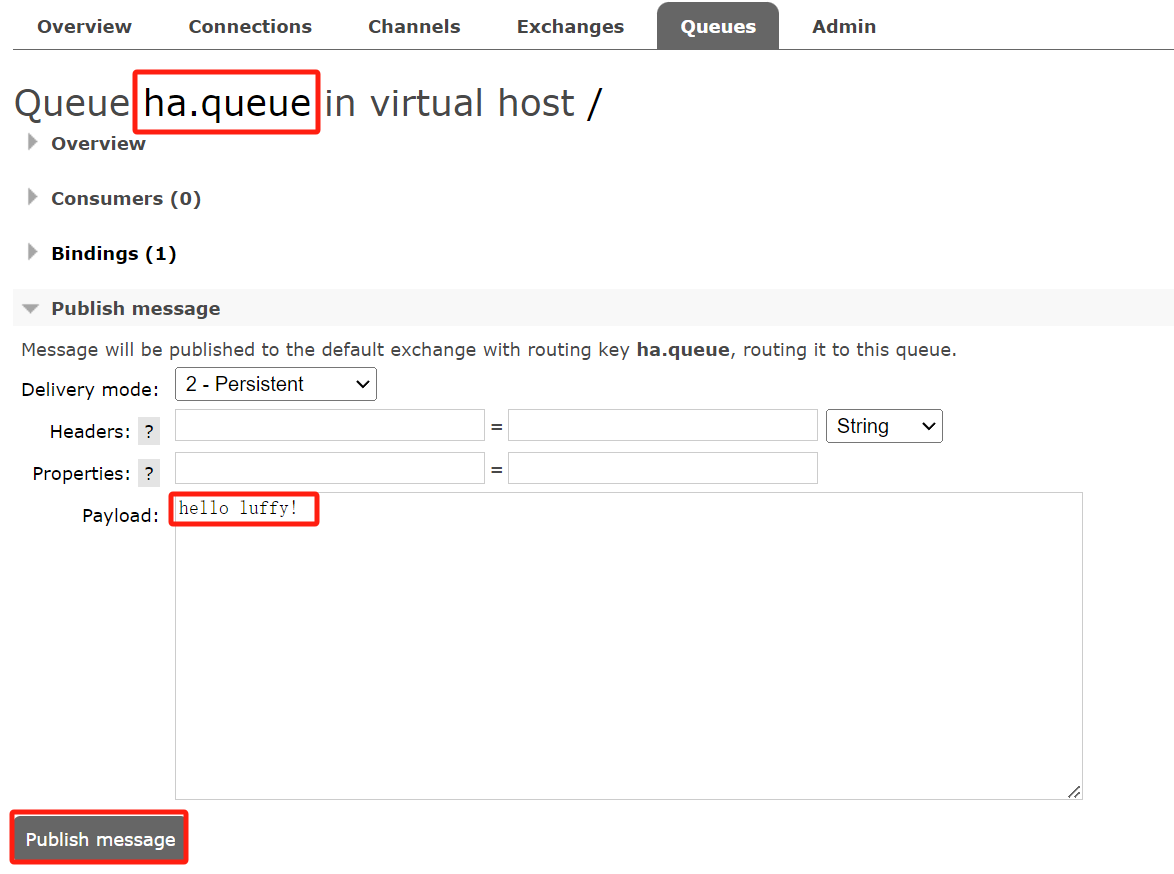
在ha.queue发送一条消息
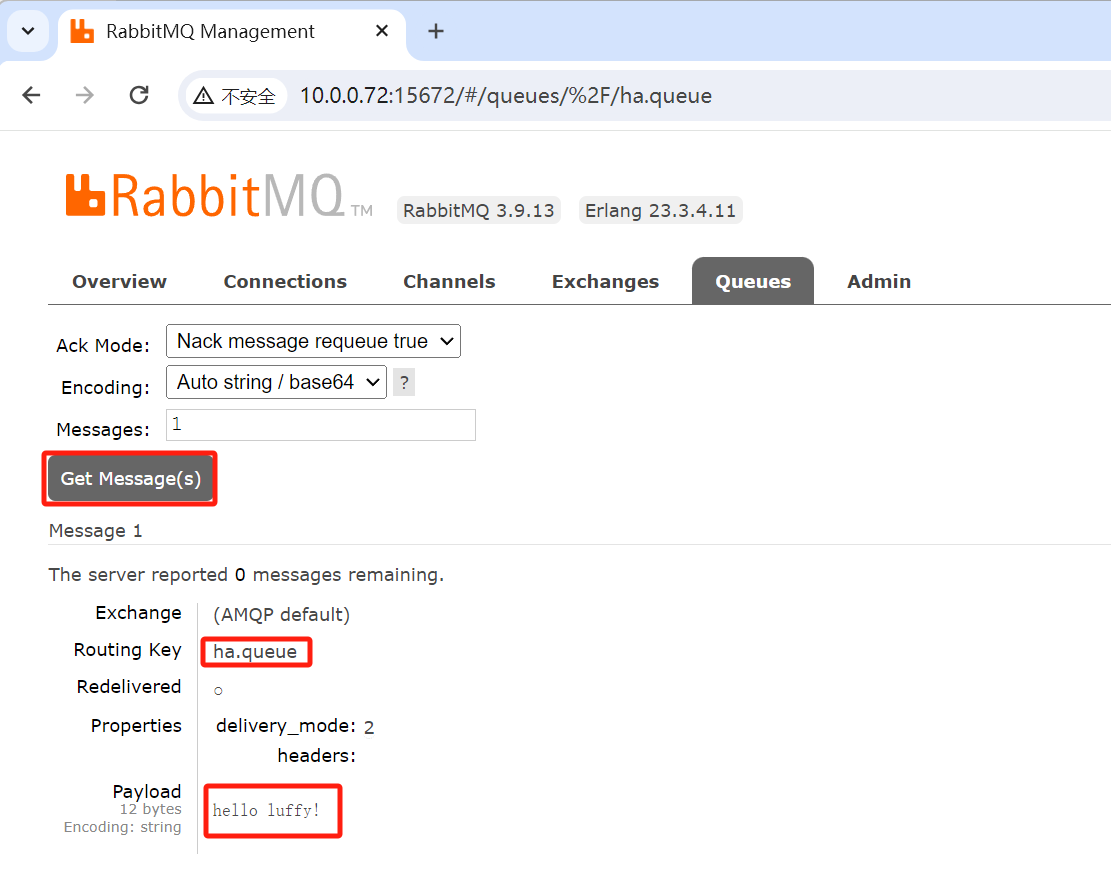
然后在其他节点的控制台查看消息
测试高可用
我们关闭主节点mq-71然后测试其他节点是否可以正常访问
[rot@mq-71 ~]# rabbitmqctl stop_app
Stopping rabbit application on node rabbit@mq-71 ...
[root@mq-71 ~]#
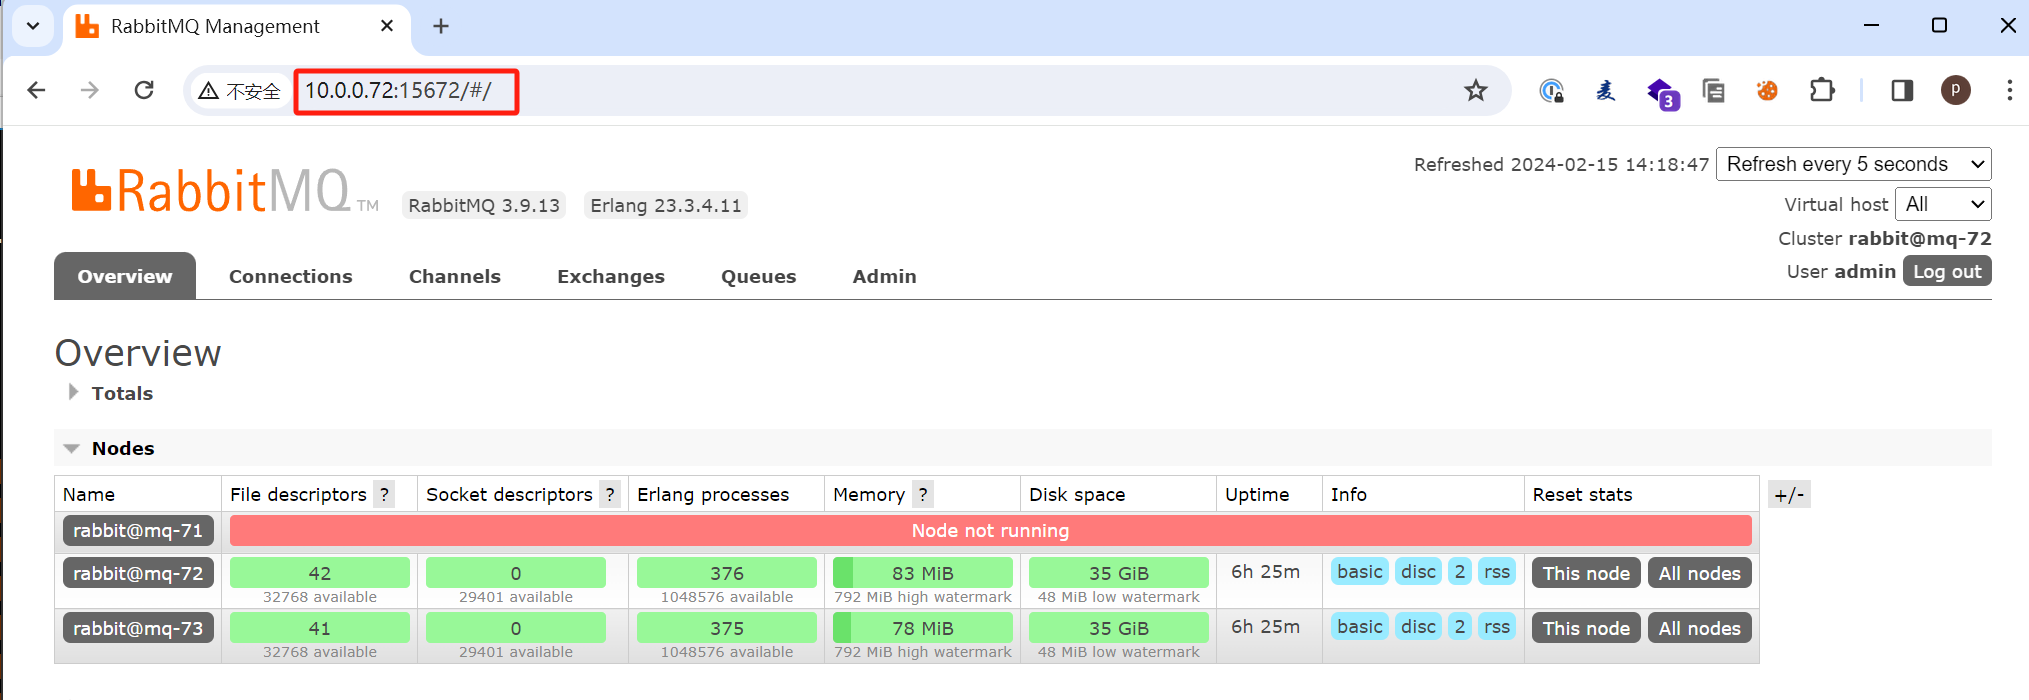
查看集群状态发现mq-71故障了,但是其他节点正常
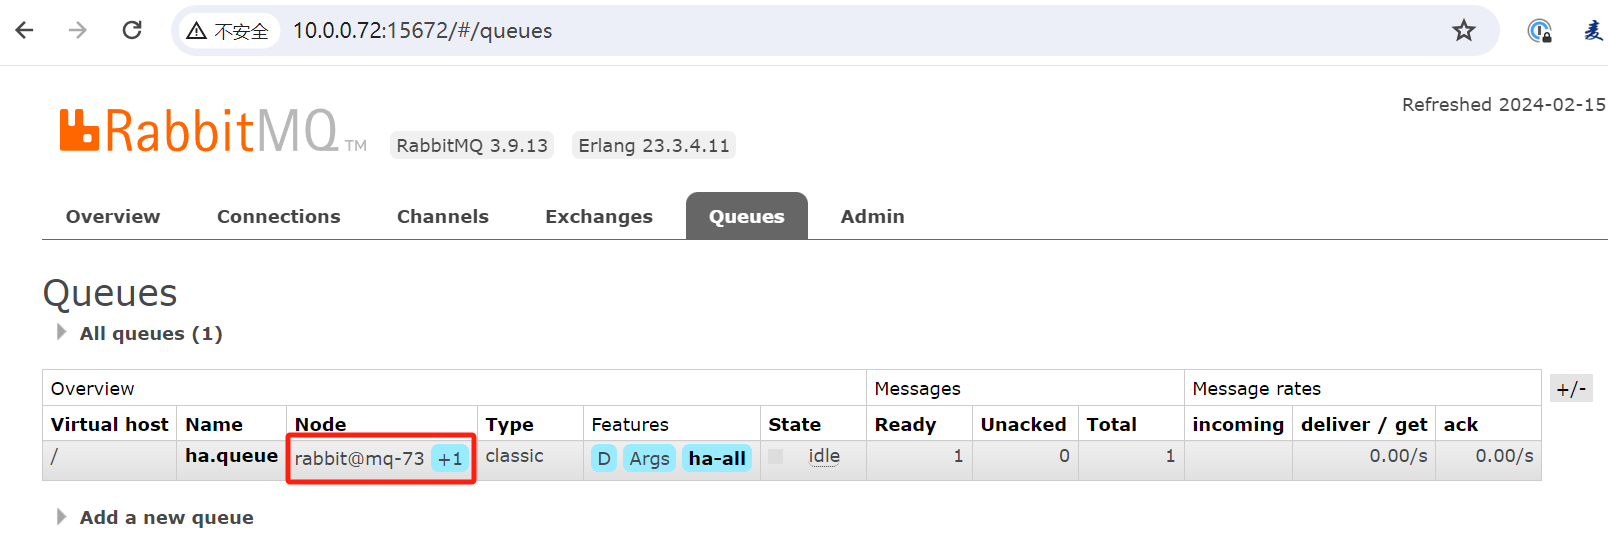
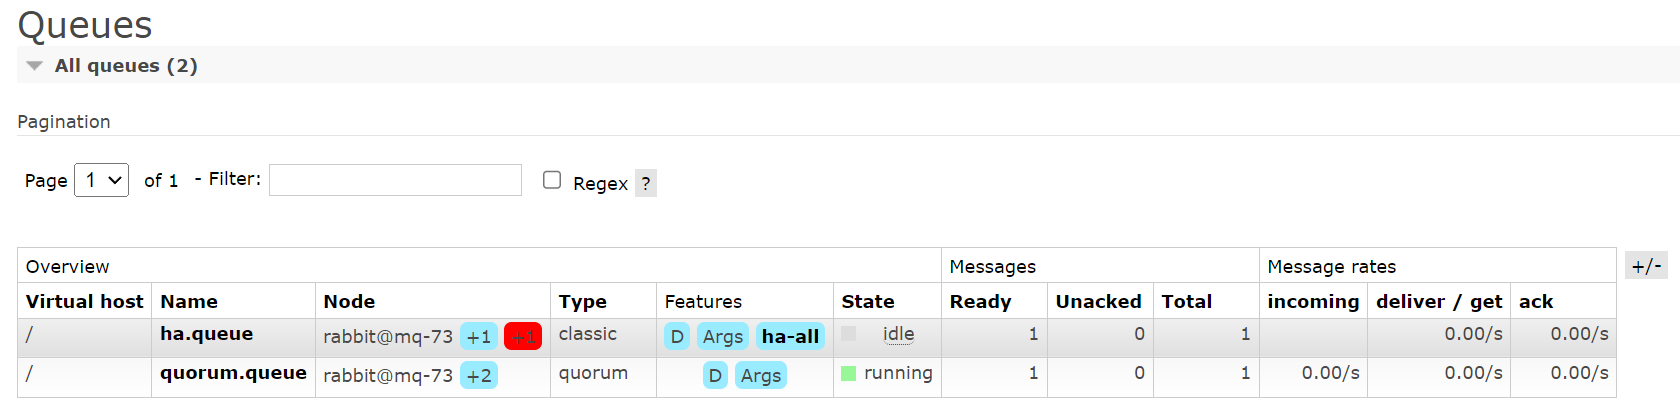
查看队列状态可以发现队列还是正常的并且mq-73变成了新的主节点
4.仲裁队列
4.1 仲裁队列介绍
仲裁队列是官方推荐的替代镜像队列的方案
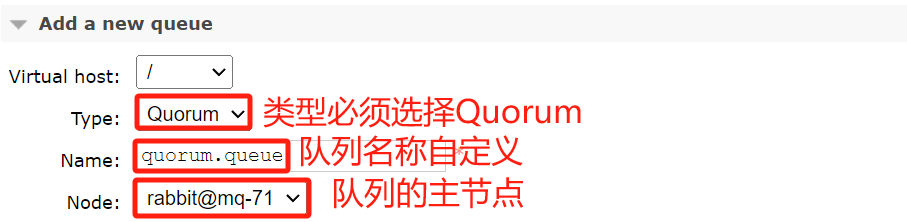
4.2 仲裁队列配置
仲裁队列不需要使用命令去配置,只需要在控制台创建队列的时候类型选择quorum即可
可以看到即使没有配置策略,仲裁队列也显示有2个Follower节点

4.3 测试
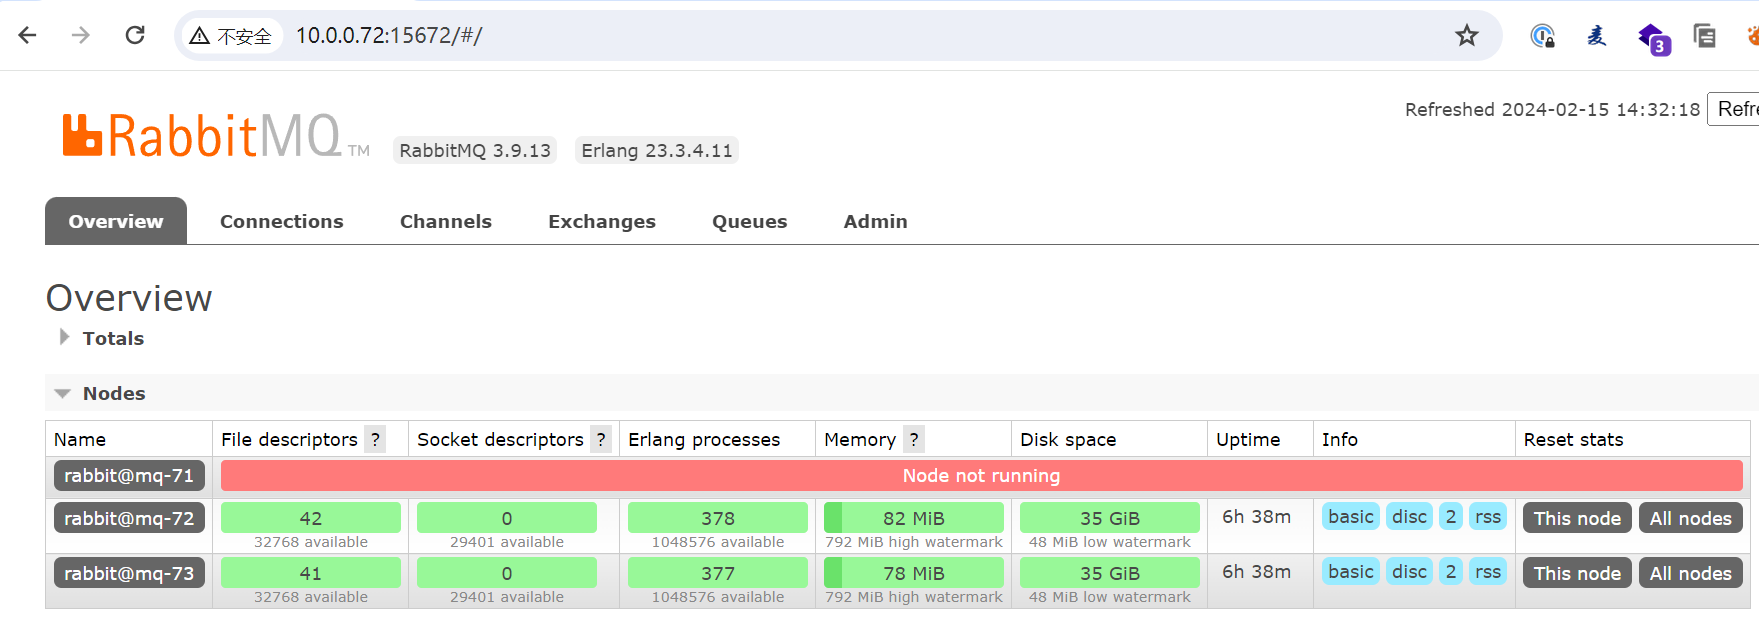
关闭主节点后超看集群状态
[rot@mq-71 ~]# rabbitmqctl stop_app
Stopping rabbit application on node rabbit@mq-71 ...
[root@mq-71 ~]#
查看集群状态
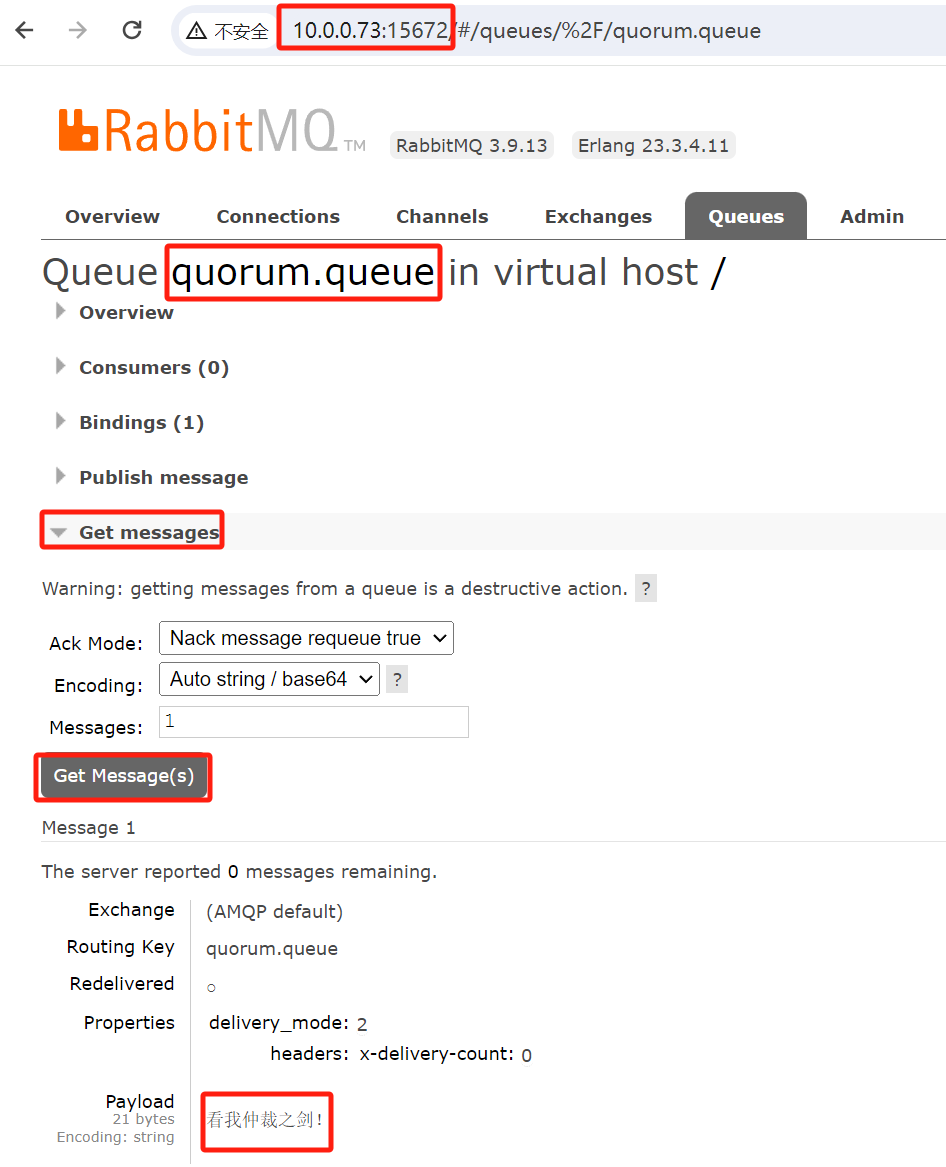
往仲裁队列写入数据

在第三个节点查看数据
修复主节点后查看发现数据自动同步了
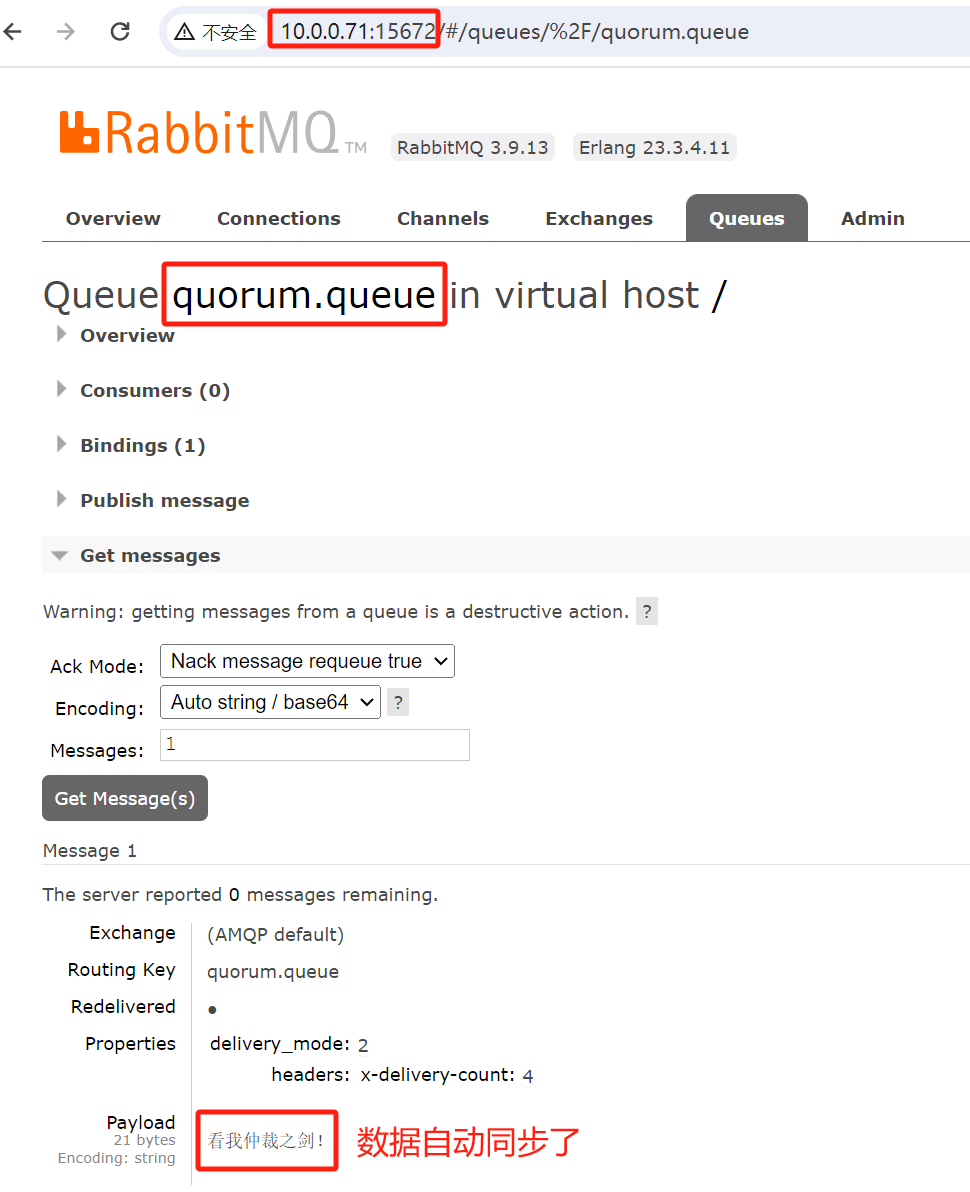
另外观察一下发现镜像策略的队列并没有同步消息给故障的主节点,因为我们没有配置自动同步,而仲裁队列即使不配置也会自动同步
更新: 2024-10-04 18:48:41